In e-commerce, first impressions count—often more than we know. Perhaps the best way to make a lasting impression on potential buyers is through a quality unboxing video. Not only do these videos highlight the product, but they also express the brand’s identity, attention to detail, and assurance of quality. Whether you’re a brand selling your own product line or a content creator working with brands, the editing process is what takes raw footage and turns it into a refined and compelling experience.
CapCut Desktop Video Editor, a free and flexible video editing software, makes this process easy even for beginners in video editing. This article will take you through the entire editing process of an unboxing video on CapCut Desktop, divided into five main steps, as well as some observations on style, narrative, and post-production techniques specific to the e-commerce environment. If your video includes narration but you don’t have recorded dialogue, CapCut’s text-to-speech tool can help you generate clean, branded voice-overs quickly.
Why Unboxing Videos Are Effective in E-commerce?
Unboxing videos play a variety of roles. They illustrate the real product, reveal packaging quality, and offer a first-hand experience of the customer’s journey. From exposing premium packaging to emphasising the best product features, a quality unboxing video instils confidence and anticipation.
Step-by-Step Unboxing Video Editing Process in CapCut Desktop
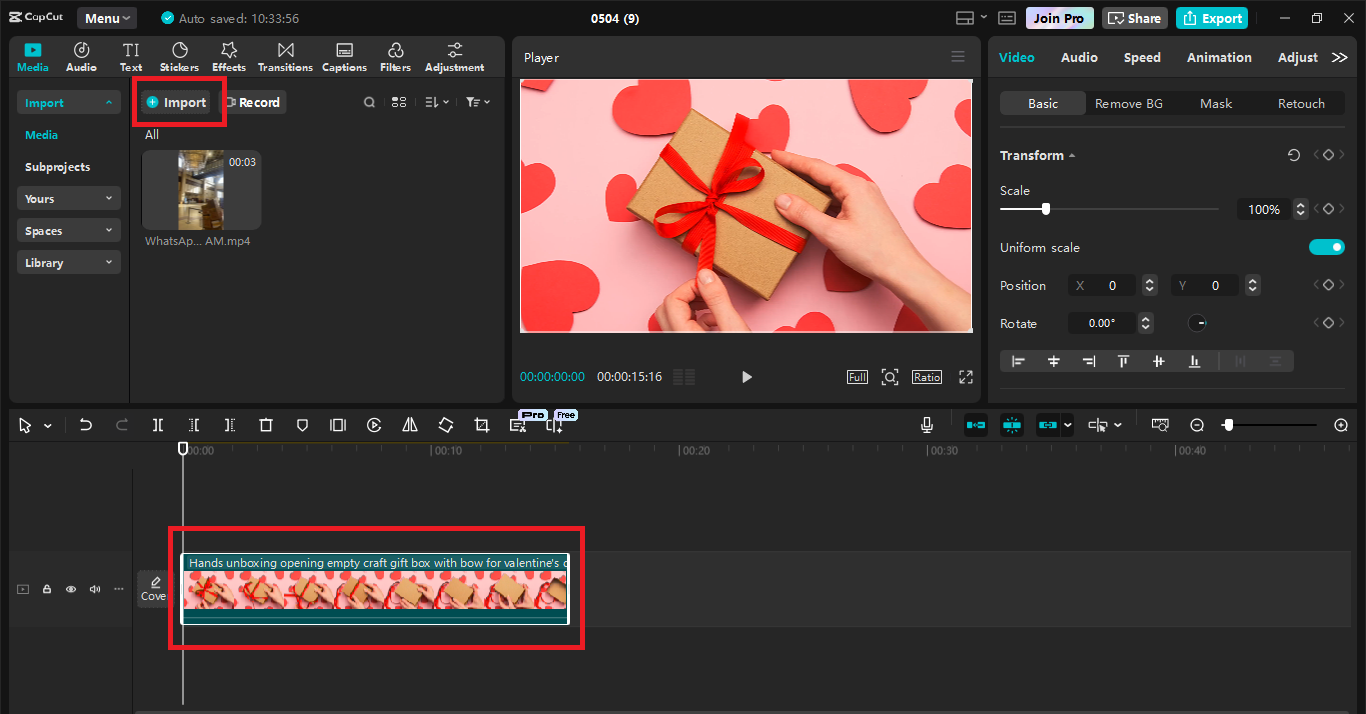
Step 1: Prepare and Trim Your Footage
Once you import your clips into the CapCut Desktop, the initial step is to sort out your raw footage. Drag all the video files related to your content into the media bin and play each of them back to find the cleanest takes. You want to trim the fat early—cut out shaky starts, unnecessary pauses, and any clips that don’t add value to the story.
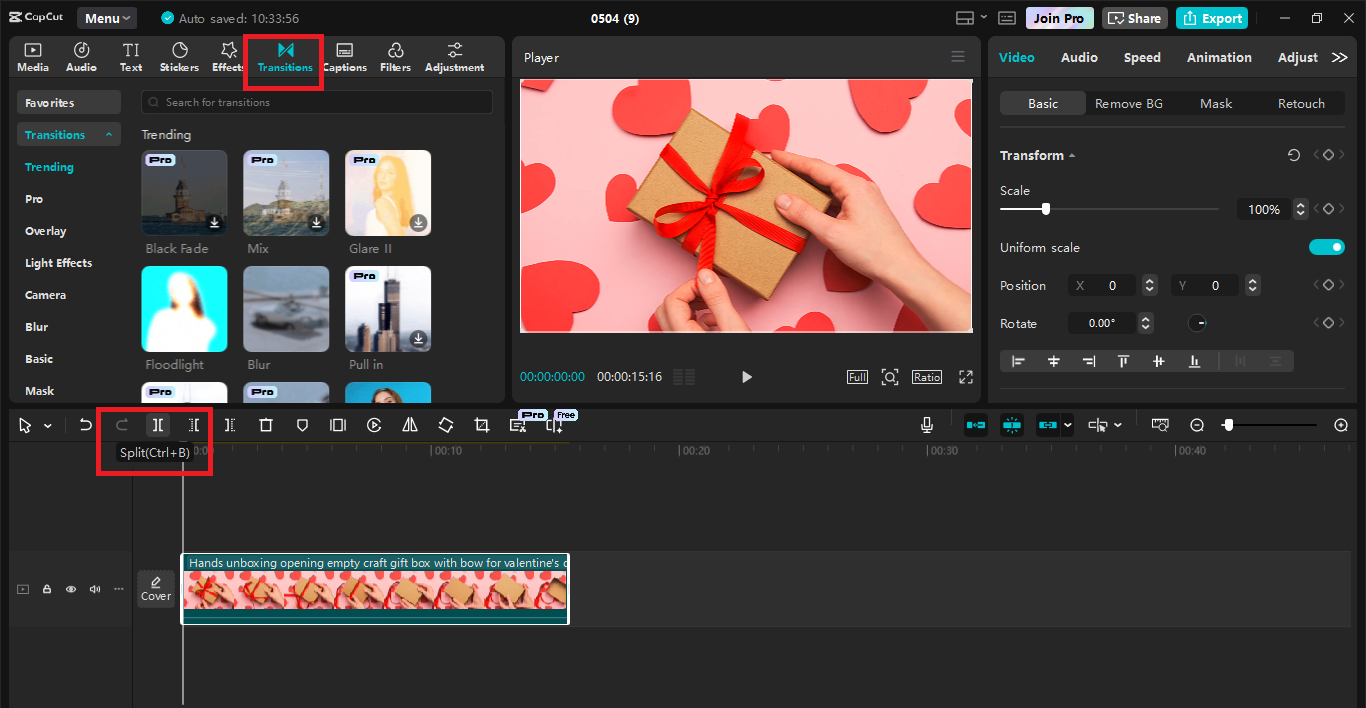
Step 2: Emphasise Smooth Transitions and Clean Cuts
The trick of an excellent unboxing video is flow. You do not wish abrupt jumps or cumbersome pauses to destroy the viewer’s attention. Apply CapCut’s blade tool to make sharp cuts and arrange your clips so that every transition looks organic. For example, if the first clip cuts off as the presenter leans forward to touch the box, the second can start when they keep doing that. CapCut also offers Transitions, but for e-commerce material to look professional, use a soft one like cross dissolves or plain fades. These do not draw attention away from the product itself.
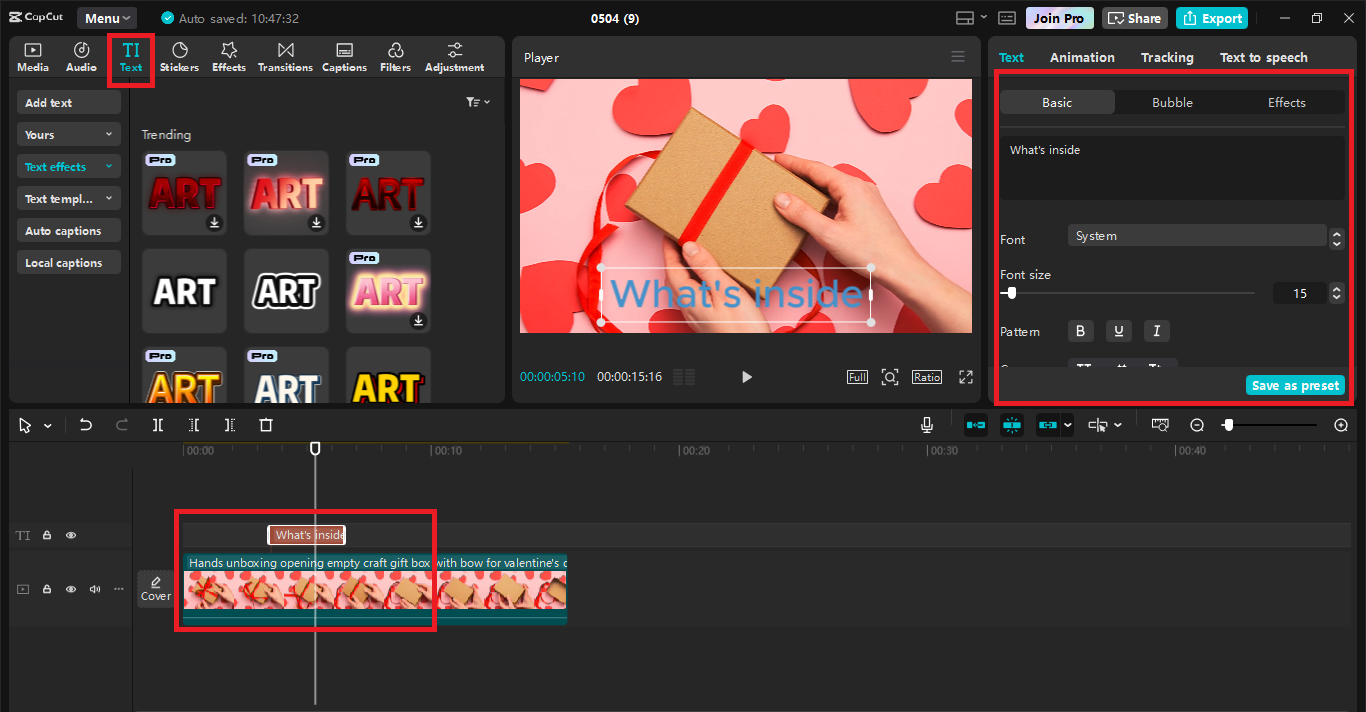
Step 3: Add Brand Elements and Text Overlays Thoughtfully
That is where branding and simplicity take over. CapCut Desktop has made it convenient to embed your logo, brand colour, and personal fonts into the project. Apply the
“Text” and
“Overlay” features to include subtle branding marks, such as the inclusion of your logo in a corner or a short intro animation. The text overlays should be readable, brief, and uniform. Do consider adding labels to pivotal points like
“Unboxing,” “What’s Inside,” or
“First Impressions.” If there are several products in the video, having a timestamped text guide for the viewer is useful. Just don’t get carried away; the images should continue to do the majority of the work. Use clean fonts (sans-serif tends to be best) and refrain from too stylised effects that take attention away from the core content. If you’re producing bulk content for multiple products, using an
AI video generator can also speed up template-based intros or brand scenes that stay consistent across videos.
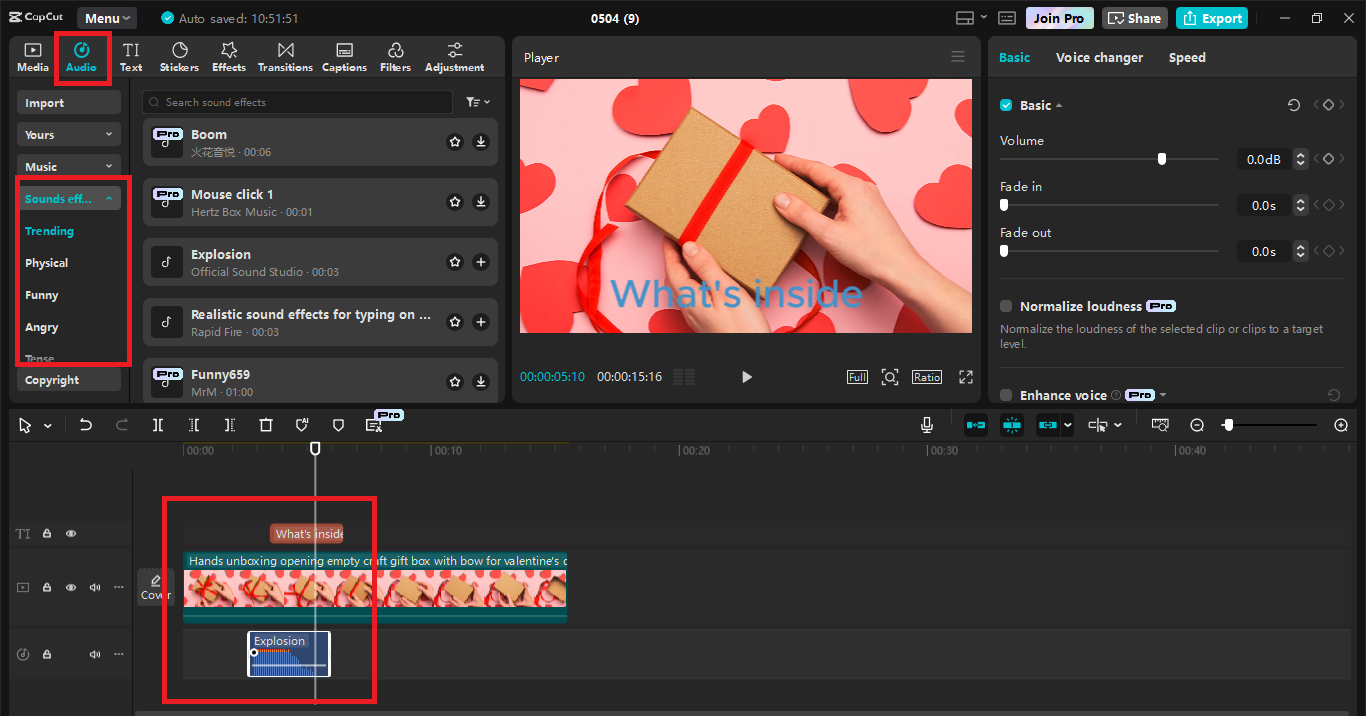
Step 4: Add Sound and Background Music
Sound design is important in an unboxing video—it adds realism and immersion for viewers. With CapCut, you can isolate and clean up the original audio. The noise reduction feature removes background noise, and you can boost any ASMR-worthy audio, such as peeling plastic or opening the box. These haptic sounds raise engagement and viewer satisfaction.
You can also include background music from CapCut’s royalty-free library. Select something energetic but non-intrusive. If you’re adding voiceover or on-camera dialogue, make sure the music does not overwhelm the dialogue. Set audio levels carefully for a good and comfortable listen-through of the video. If you’re adding variety to your narration, using a
voice changer within CapCut can help subtly tweak the tone or gender of your voiceover without needing to re-record.
Step 5: Export and Optimise for Platform-Specific Requirements
When your video is sound and picture ready, it’s time to export. CapCut Desktop lets you export in various resolutions and formats based on where you’re uploading. For YouTube, use 1080p or 4K resolution for optimal quality. For Instagram Reels or TikTok, you can switch to a vertical aspect ratio (9:16). CapCut simplifies this with its preset aspect ratios. Give your file a proper name, apply compression settings that don’t compromise on visual quality, and always preview your final export before uploading. It’s also a good idea to export a backup copy without music in case you have to reuse the video with alternate audio for another site.
Additional Tips for Successful Unboxing Videos
Prepare Your Shots Before You Shoot: A clean edit begins with thoughtful shooting. Employ a clean, well-lit background and stabilise your camera to minimise the amount of post-production correction required.
Keep It Short: Although it’s tempting to include every bit of information, viewers enjoy a video that does not waste their time. Select 2–4 minutes of concise, engaging content.
Emphasise Key Features Visually: Employ zoom-in or slow-motion shots to highlight details such as product texture, add-ons, or selling points. CapCut’s speed control and motion features facilitate this.
Add Captions for Accessibility: Subtitles or captions make your content more accessible to more people, including viewers watching with sound off. Automatic captions are available in CapCut, which allows you to change the style.
Stay On-Brand: Align the video’s tone and aesthetic with your brand voice. A high-end product may require more deliberate pacing and refined cuts, whereas a technology device could use quicker editing and bold overlays.
Final Thoughts
Unboxing videos have carved a strong niche in the e-commerce environment, serving as a connection between product and consumer. They leverage human curiosity and provide a sensory advance that tends to sway the purchase decision. However, to be most effective, an unboxing video needs to be edited with accuracy, consideration, and style.