Nordic Wonder
by Northern Life
GET CREATIVE THIS CHRISTMAS!
Light Up Terraniums!

1. Start by lining your terrarium or vase with compost and moss. Achieving a distinctive line between the two will help create a more interesting look.
2. Start to add in your pinecones and moss branches to create depth within your terrarium. We also added faux earth Eucalyptus for an extra colour element.
3. To take full advantage of your real Christmas tree this year, take small trimmings and place them inside your terrarium or vase, or add in small home decorative elements to create your own little woodland. We’ve used decorative trees, only £12.99 each.
4. Add wired lights for added Christmas sparkle that will brighten up any space. dobbies.com

Nordic wreath
How to Create a Rustic Nordic Wreath
All you will need to create your Nordic Wonder wreath is a wired ring, floristry green wire, secateurs, real Conifer foliage to act as your base, faux foliage and wired lights.
1. First, start by creating small bundles using your fresh Conifer foliage and then attach these to your wired ring using additional wire. Keep repeating this process until you have an even base. If you would only like to use faux stems, a great alternative is our Amber Foliage Garland.
2. Once you have a base, it’s time to start adding in your faux stems. We used a mixture of Eucalyptus stems and Earth Eucalyptus to bring in warmer tones. Using wire to attach to your base, layer in your stems until you are happy with the overall shape and definition of your wreath.
3. Lastly, to create a Christmas glow, add wired lights to highlight all the gorgeous foliage, and let the warm tones shine through. dobbies.com
Upcycled Sock Knisser Gnomes

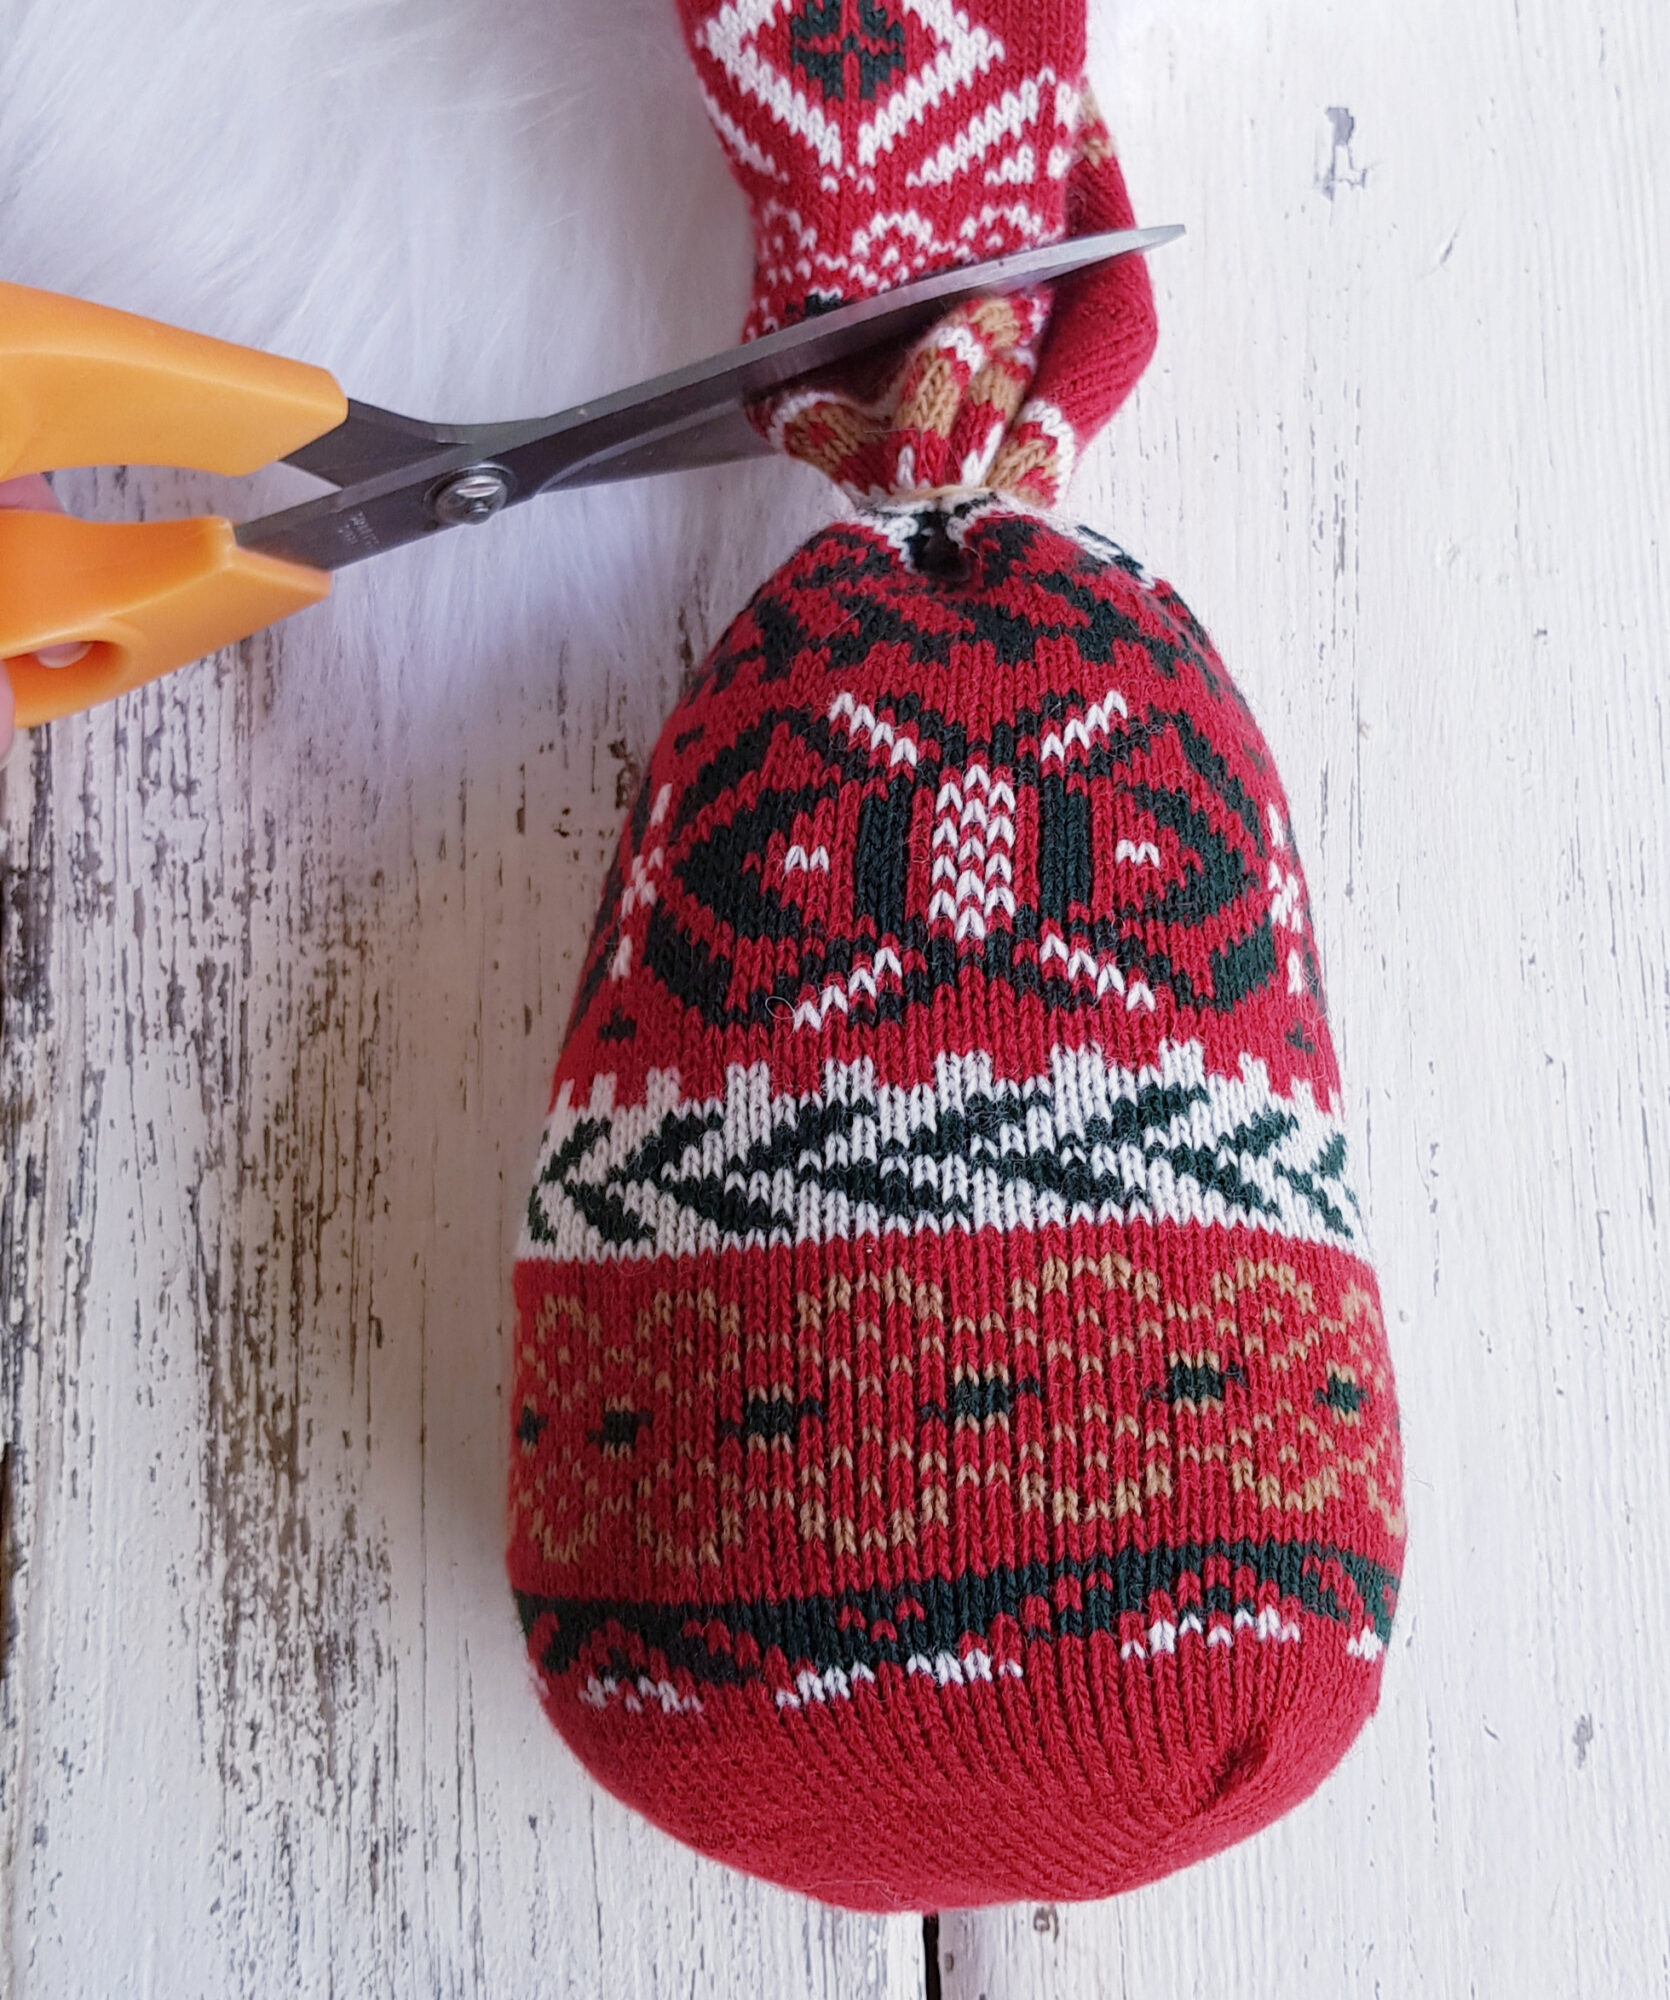
These festive gnomes are so quick to make and don’t even require any sewing, just a hot glue and scissors. We always seem to have an excess of single socks every time I do any laundry, so it is a great way of recycling them. When cutting the faux fur, the trick is to cut only the backing fabric and not the actual fibres themselves, otherwise you will end up with an uneven finish. The easiest way to do this using scissors is by marking out the shape you require on the backing (ensuring the fur is pointing down) and then making lots of small snips, brushing the nap away from the cut edge as you work. However, it is much quicker to use a sharp craft knife if you have one, then you can regulate the depth of the cut and ensure you don’t hack into the beard fluff itself.
You will need 2 socks, ideally in different colours, 1kg of rice, hot glue gun, elastic band, wooden beads (12mm in this case), white faux fur.
1. Fill one of the socks with rice to make the base of the gnome. The quickest method for this without making a dreadful mess is by filling a pint glass with rice, putting the sock over the rim and then inverting the glass. Repeat with the second pint of rice.
2. Mould the sock between your hands until you have an even, cone-shaped base then fix the elastic band around the top.
3. Snip off the excess sock fabric and then apply a ring of hot glue around the elastic band, pushing the trimmed material into the adhesive to secure it.
4. Snip your faux fabric into a beard shape, cutting out a small V-shape from the top edge. Apply a line of glue to the top at the back and then fix on to the base, about halfway up.
5. Take your second sock and pull it down over the base so the hem is covering the top of the beard, folding it up into a nice brim. Make sure the heel is pointing towards the back of the gnome.

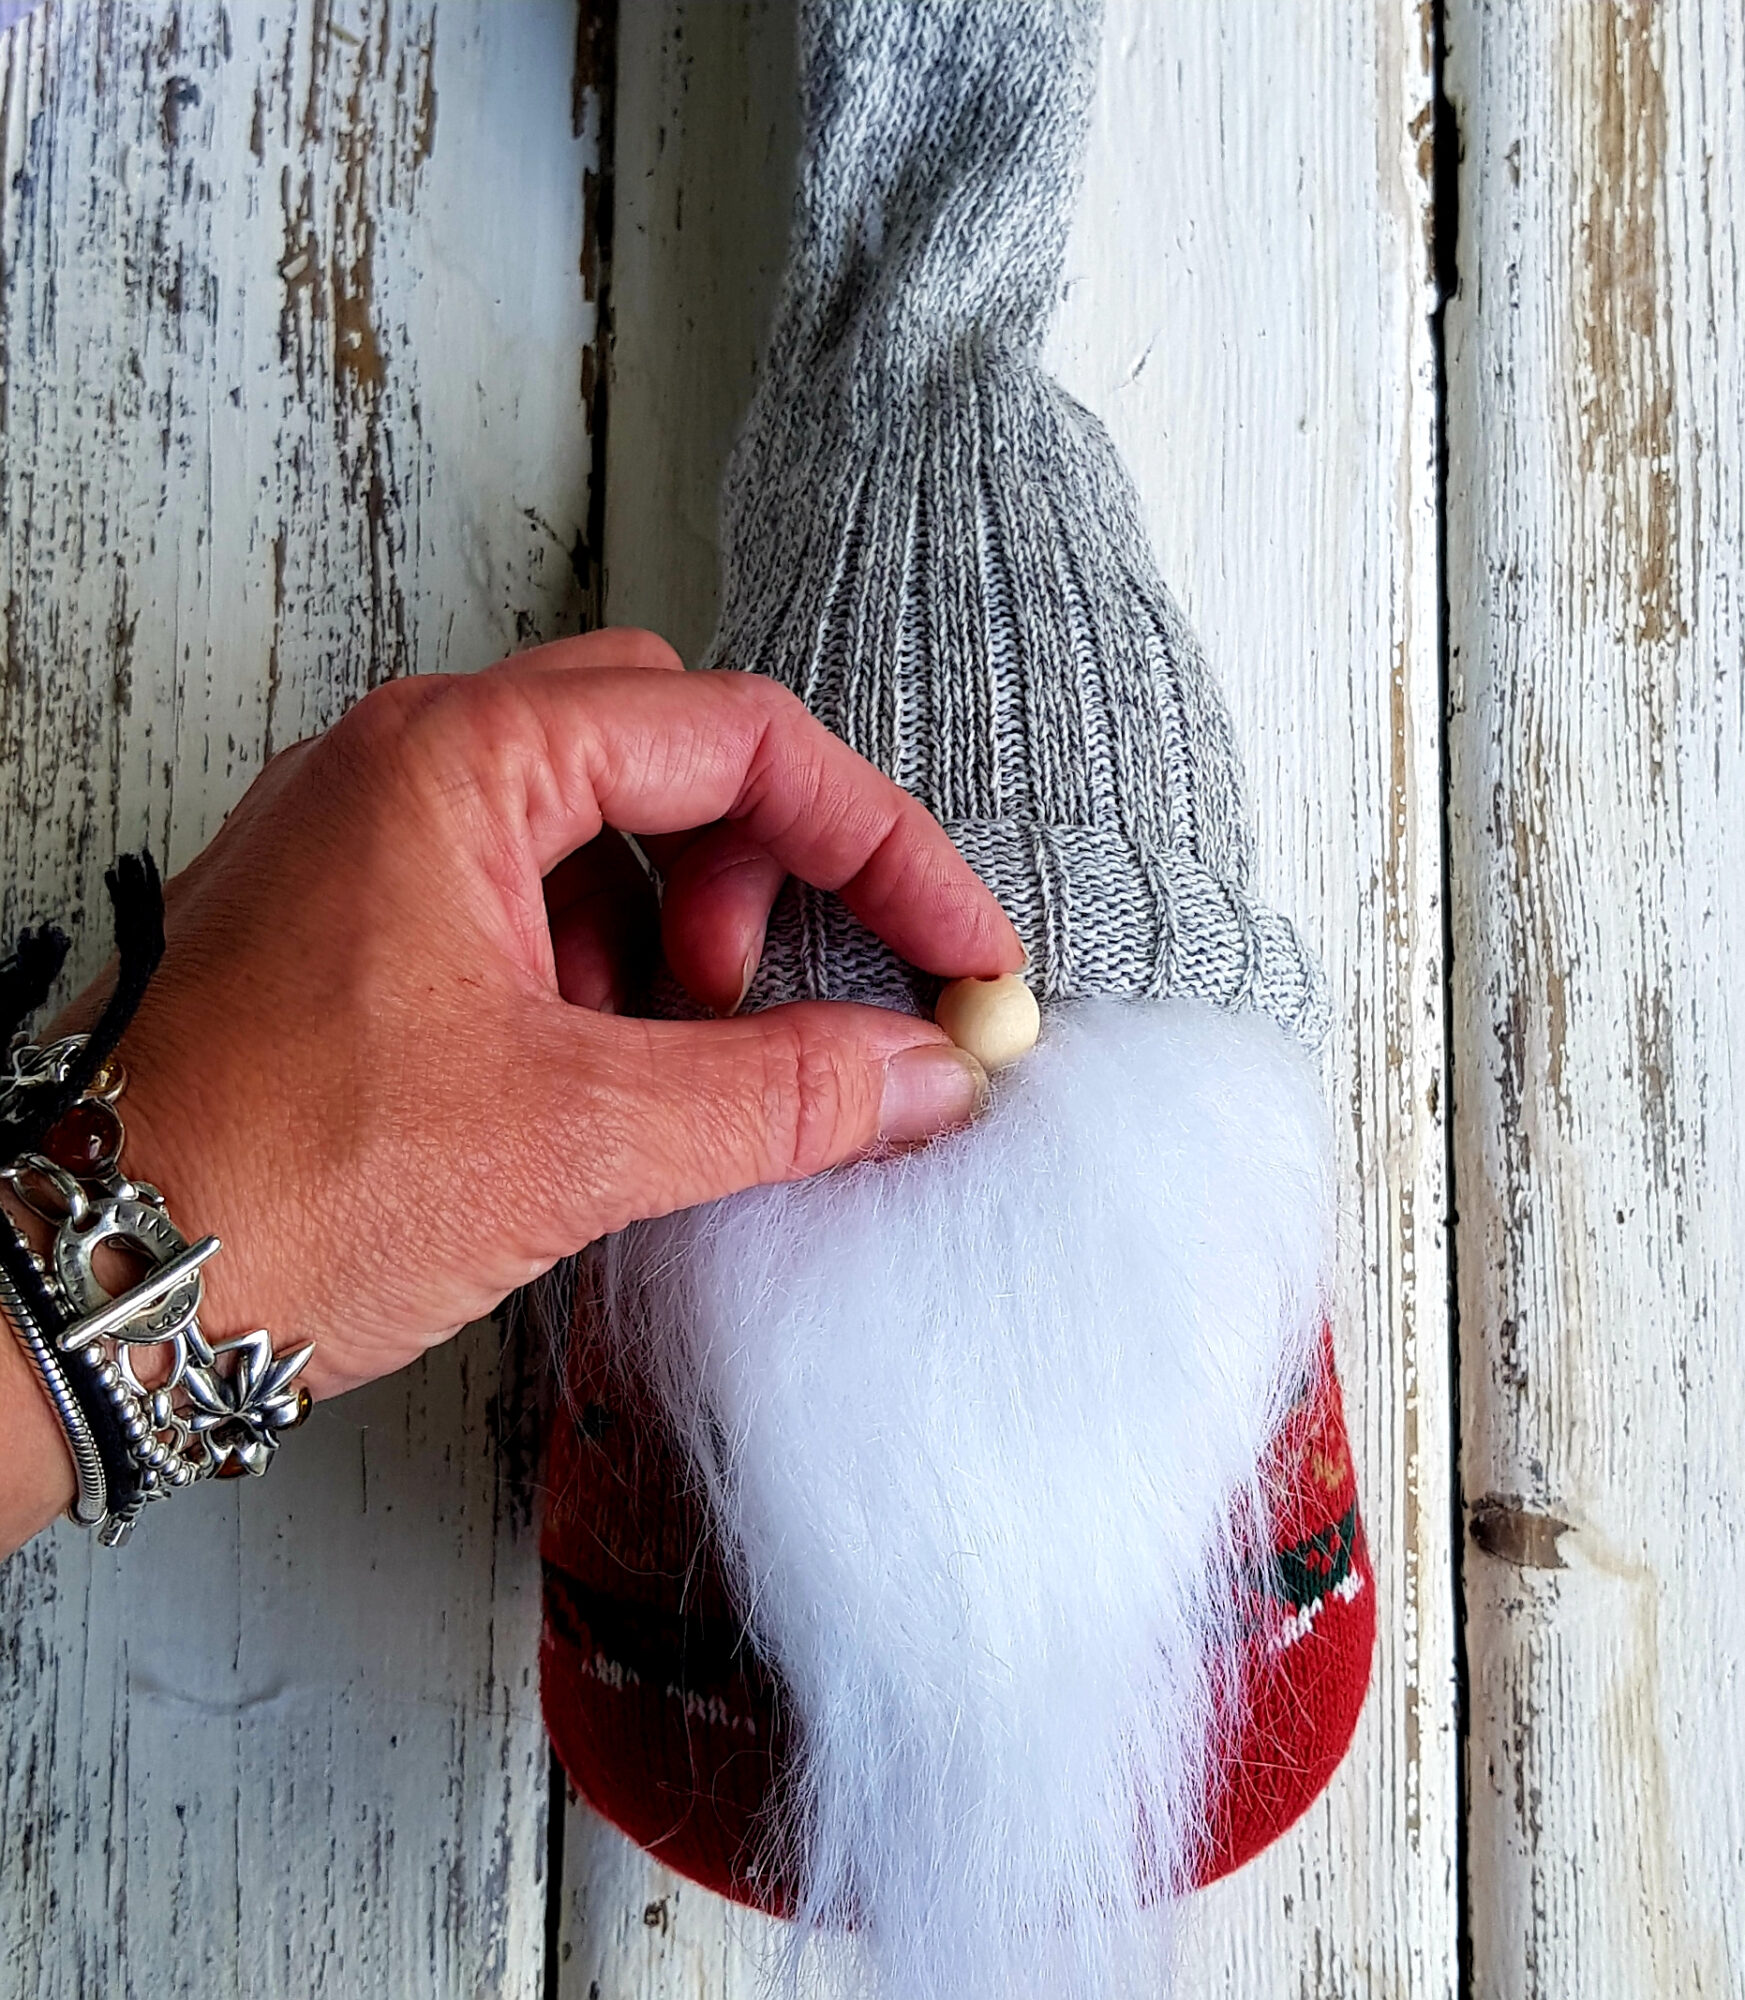
6. Add a dab of hot glue to one of the holes on the wooden bead and then push it into the V-shaped cut to make a nose.
7. Blob a little more on the second bead hole and bring the hat down to cover it.
8. Working round the brim of the hat, add more adhesive and secure it to the body.
9. Tie a section of ribbon or baker’s twine around the top of the hat, then snip off any excess.
10. To make a girl gnome, the process is the same, except for the lack of beard. Cut three thin strips of fur fabric or chunky wool, and plait them together to make a braid, tying off one end with baker’s twine in a bow. Repeat to make a second braid.
11. Glue the braids underneath the hat brim before fixing on the nose.
Craft Your Own Cosy Scandi Christmas by Becci Coombes (£18.99, White Owl)
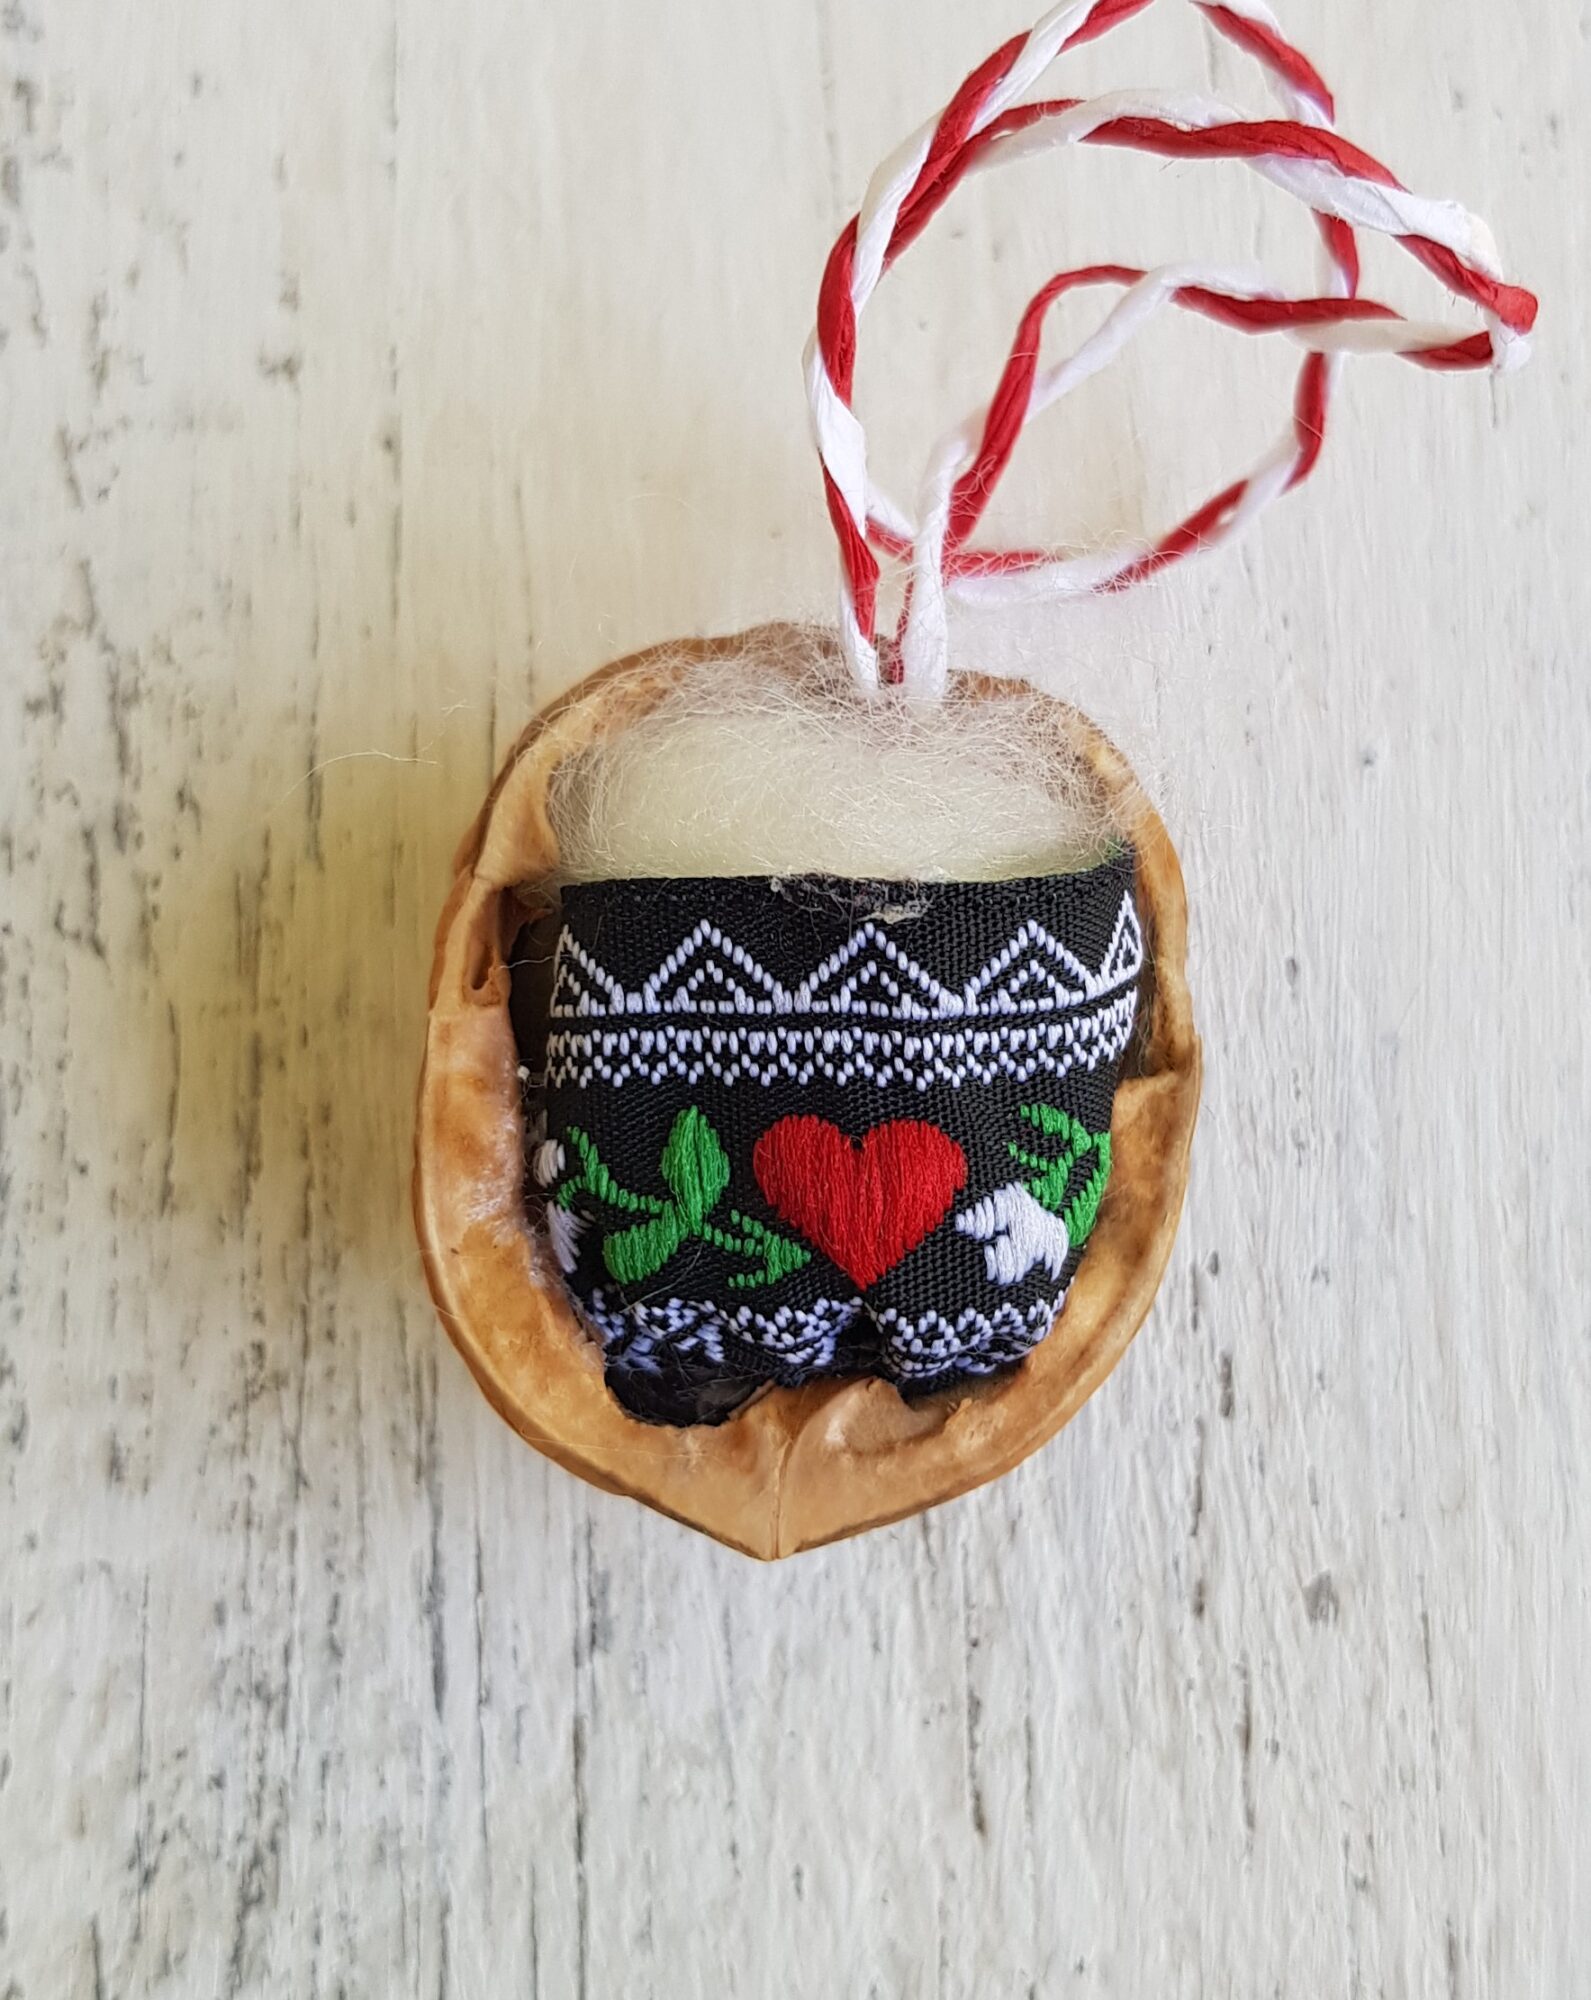
Walnut Pixies
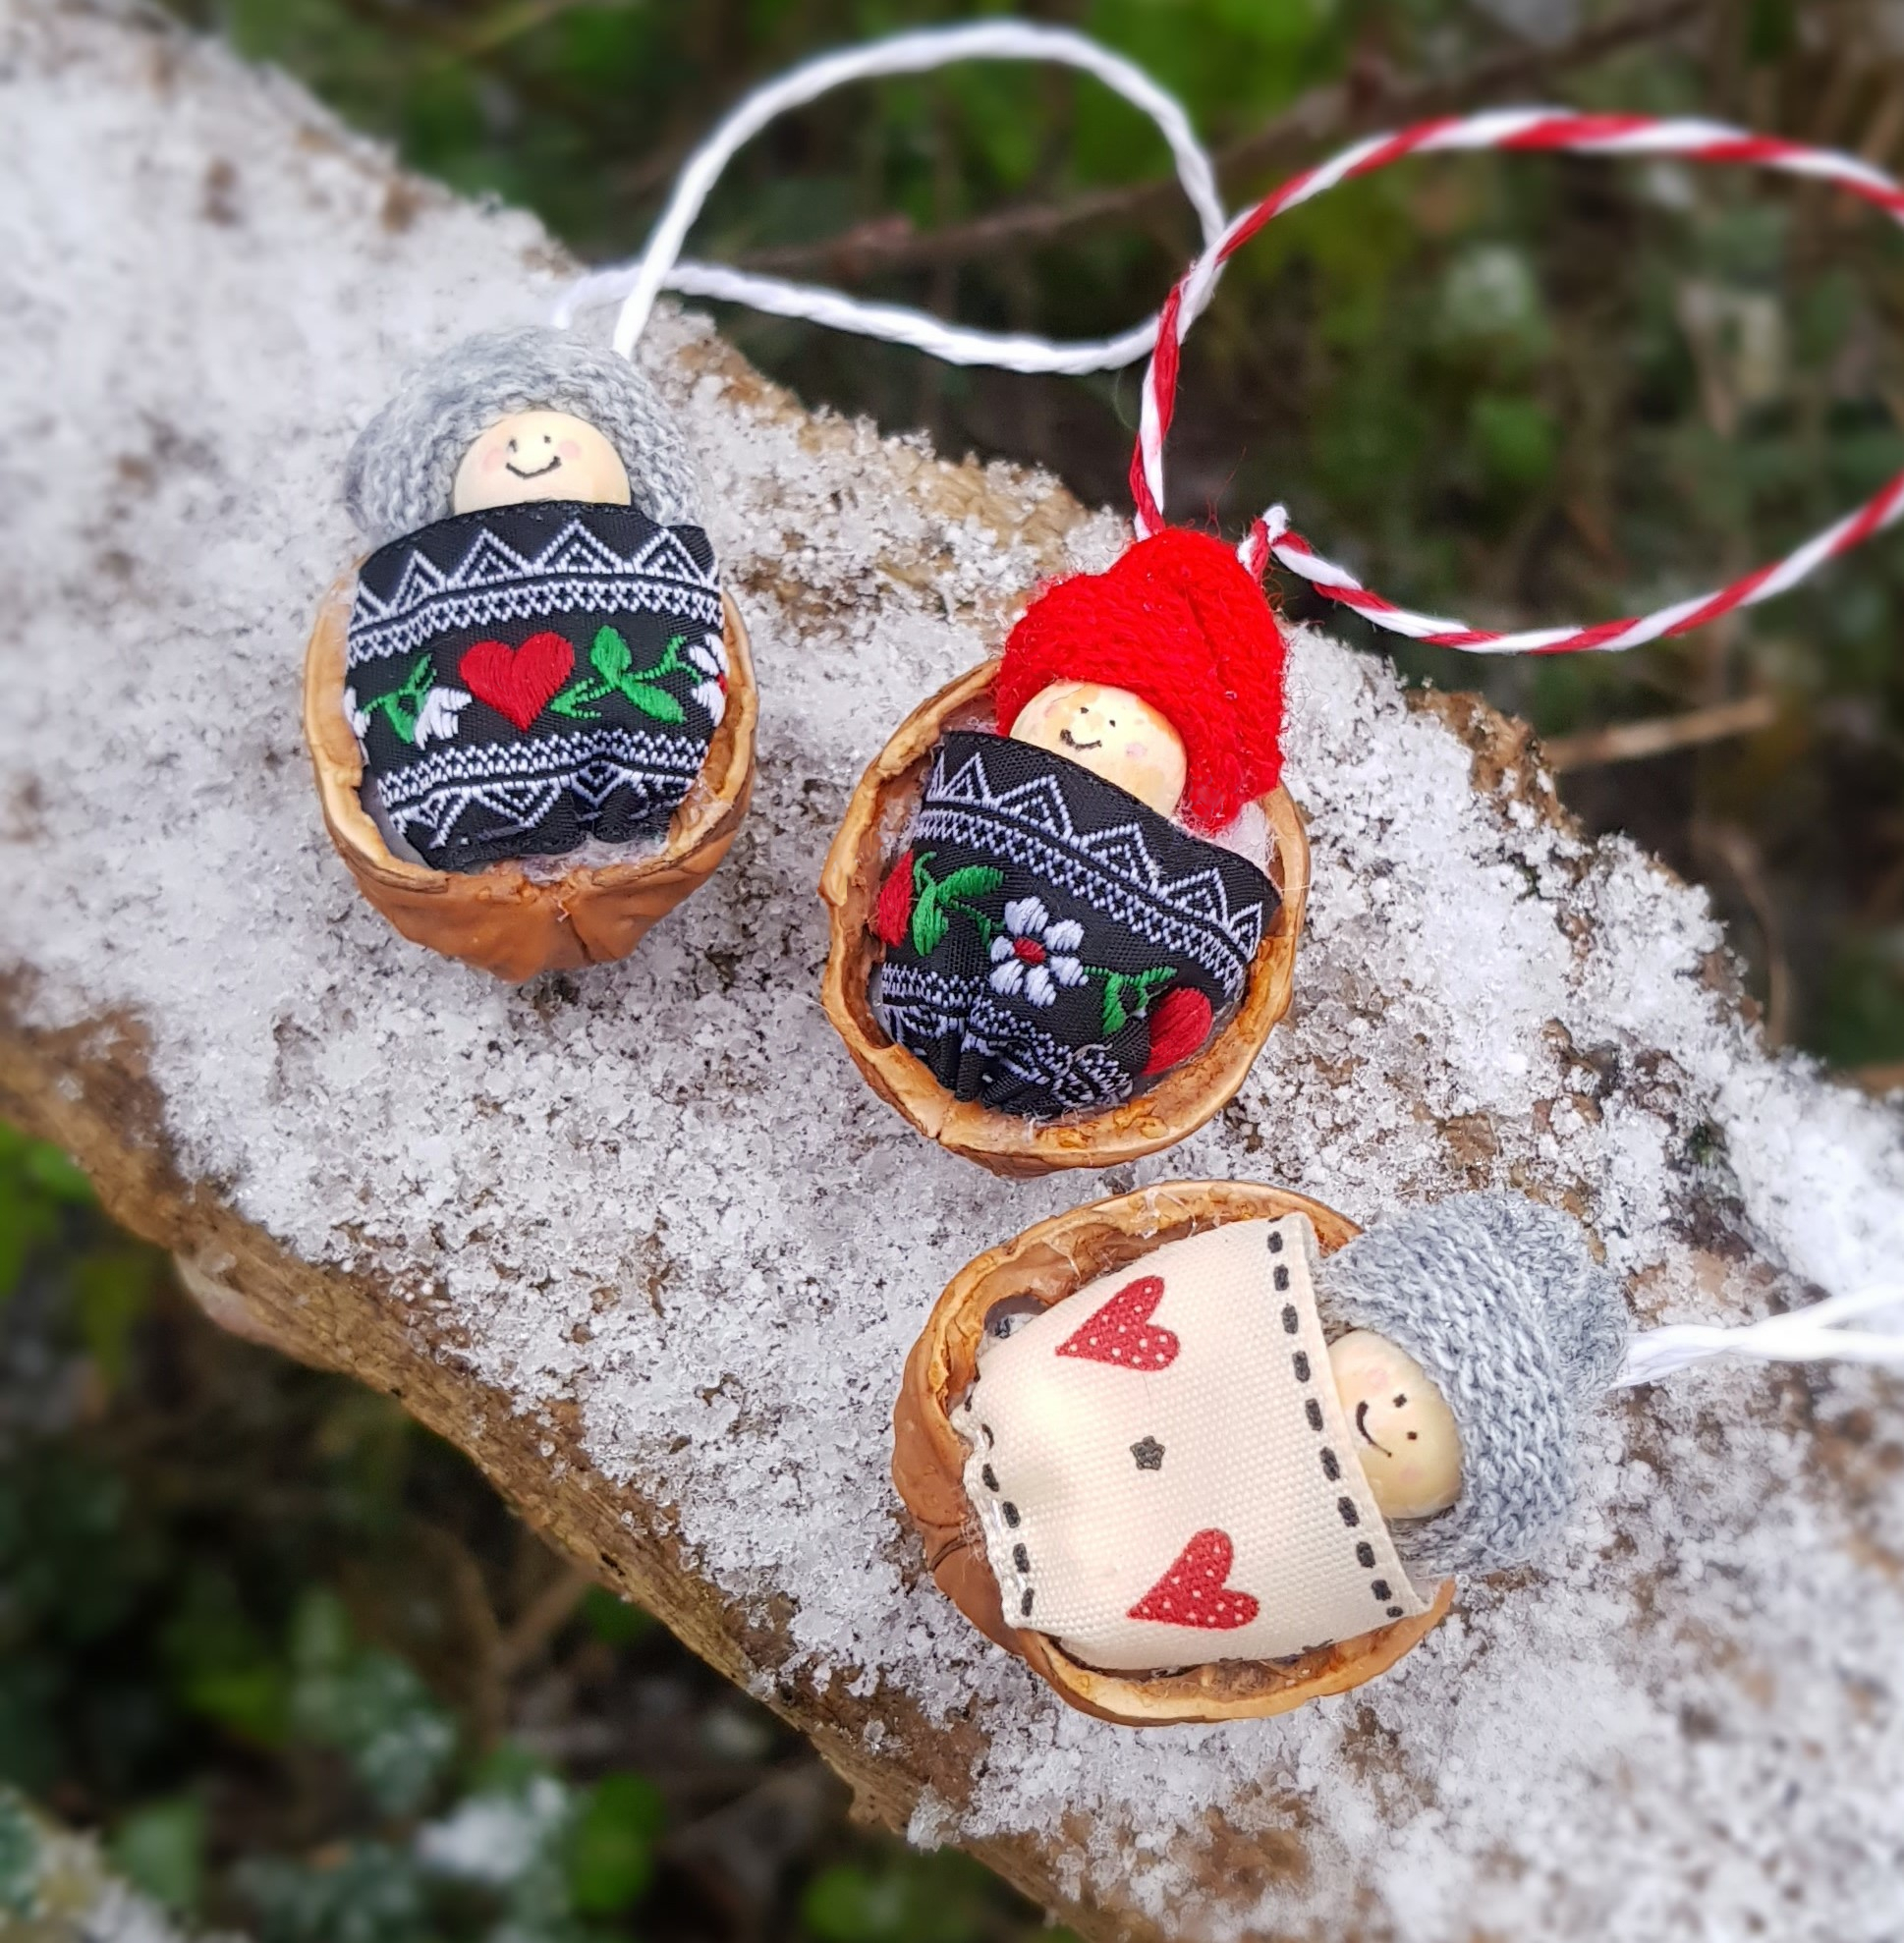
These dear little walnut babies are so quick to make in batches; in fact the hardest part is cracking the shells neatly. Pre-prepared walnut shells are available to purchase specifically for crafts, but the problem with that is that you don’t get to eat the nut itself. The easiest way to split them in half neatly takes a little preparation but should guarantee a higher success rate than if you just attack them with a nutcracker (older walnuts will split more easily than fresh ones). Soak the nuts overnight in a bowl of boiling water. Rinse them and dry thoroughly. Take a sharp knife and carefully push it into the split at the rounded end of the nut, then gently wiggle towards one side along the crease. Remove the knife, turn the nut round and once again wiggle down the split. Now place the knife horizontally along the split and gently push down on the knife, applying firm pressure. The walnut should open into two equal halves; it probably won’t work every time, but certainly gives you a higher success rate than any other method. (The leftover walnut pieces are delicious plunged into a jar of golden runny honey, steeped for a few days and then spooned over creamy natural yoghurt for breakfast). Once you have cracked the trick of splitting the walnuts open, there are so many speedy ways of making dinky decorations.
You will need walnut shells, cotton wool balls, 25mm jacquard ribbon, knitted glove, baker’s twine or paper ribbon, needle and thread, hot glue gun, fine marker pen.
1. Cut a 4–5cm section of ribbon; if it has a pattern make sure it is centred where you would like. Thread the needle with a double length of cotton and then sew a line of tiny running stitches along the bottom of the ribbon.
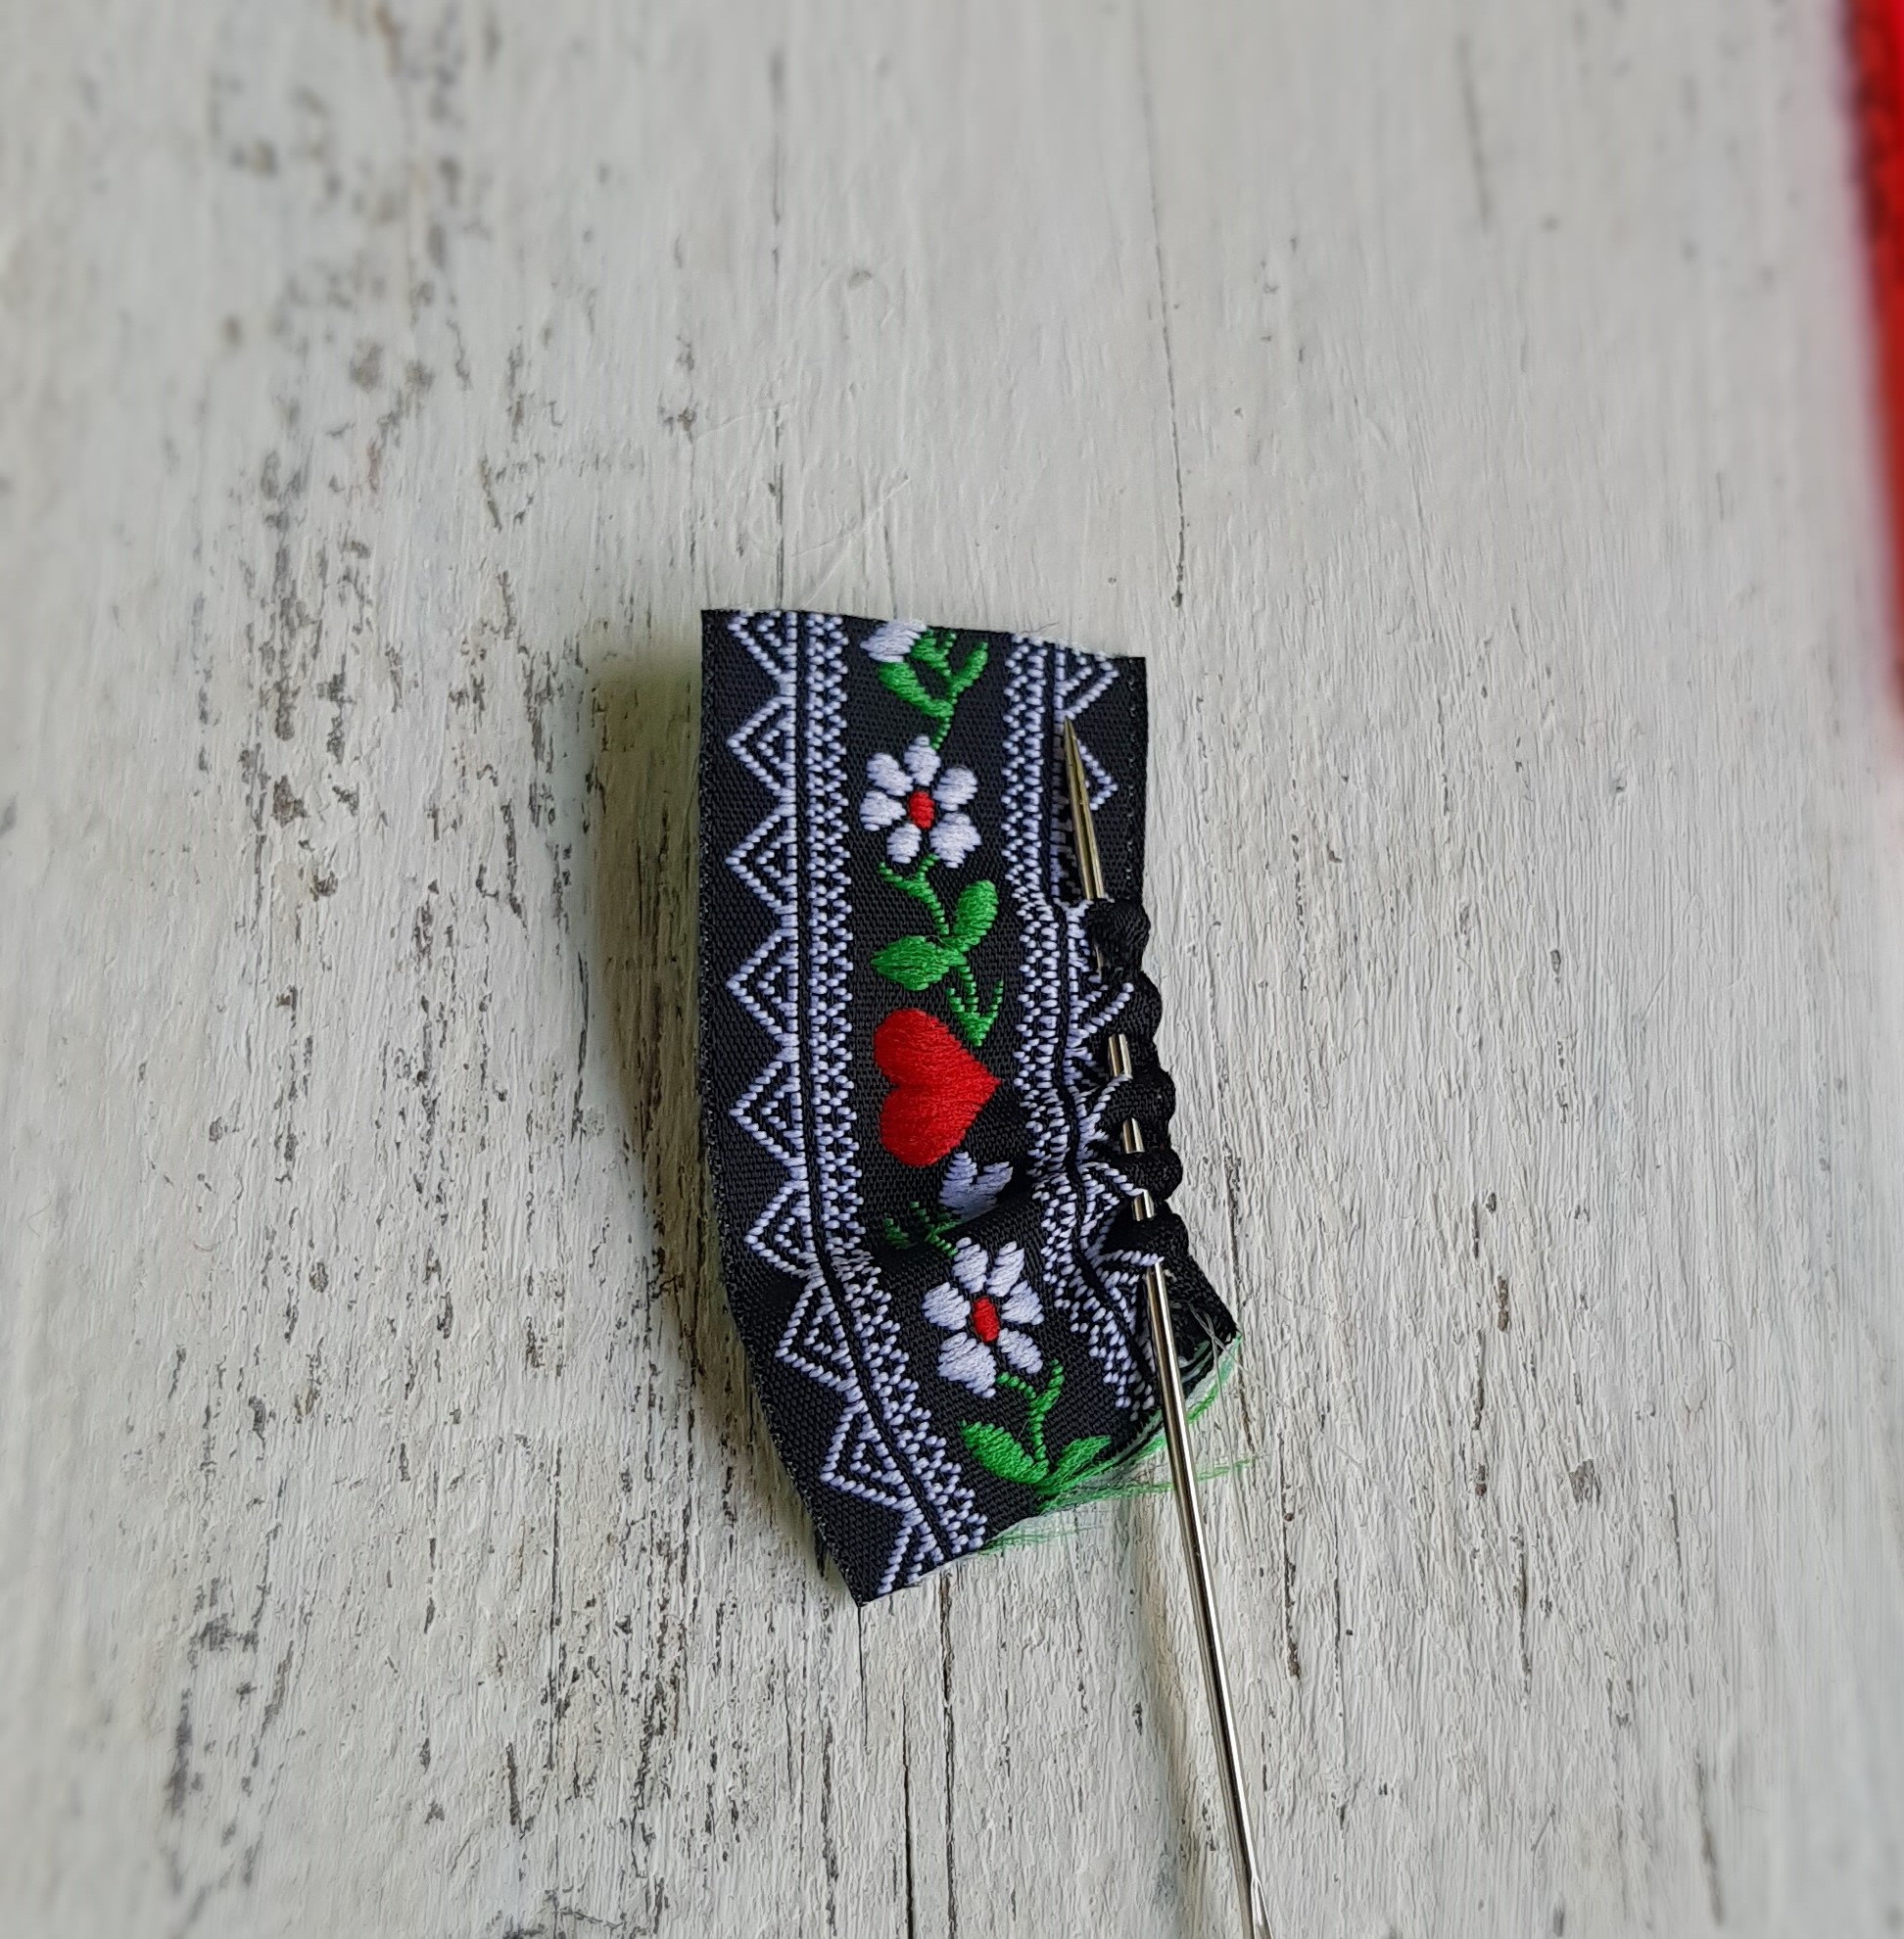
2. Draw the thread up gently so the ribbon makes a ‘cup’ shape; don’t pull it all the way as then you won’t get such a rounded bed shape.
3. Glue half a ball of cotton wool into the base of the shell to fill it, then add another little blob of adhesive to its pointy end and attach the two ends of the twine to make a hanging loop.
4. Take the ruched ribbon and glue half a cotton wool ball to the reverse side to puff it out, then add more adhesive and secure it to the lower half of the walnut shell.
5. To make the head and hat, firstly draw a tiny face on the wooden bead, ensuring the holes are pointing vertically. I always think it is best to draw the features on at this stage then if it ends up with a face like a baby gargoyle you can always spin it round and have another go at it.
6. Snip a 4cm section of finger from the glove and roll the cut edge over twice to create a little knitted hat. Insert the glue gun and add a coupleof blobs of adhesive to secure the brim, and then squirt a generous amount up inside the hat. While the glue is still warm and pliable, pinch the front and back of the hat together. Blob a little more glue on the left-hand side of the hat at the top, then fold it over and attach it to the brim.
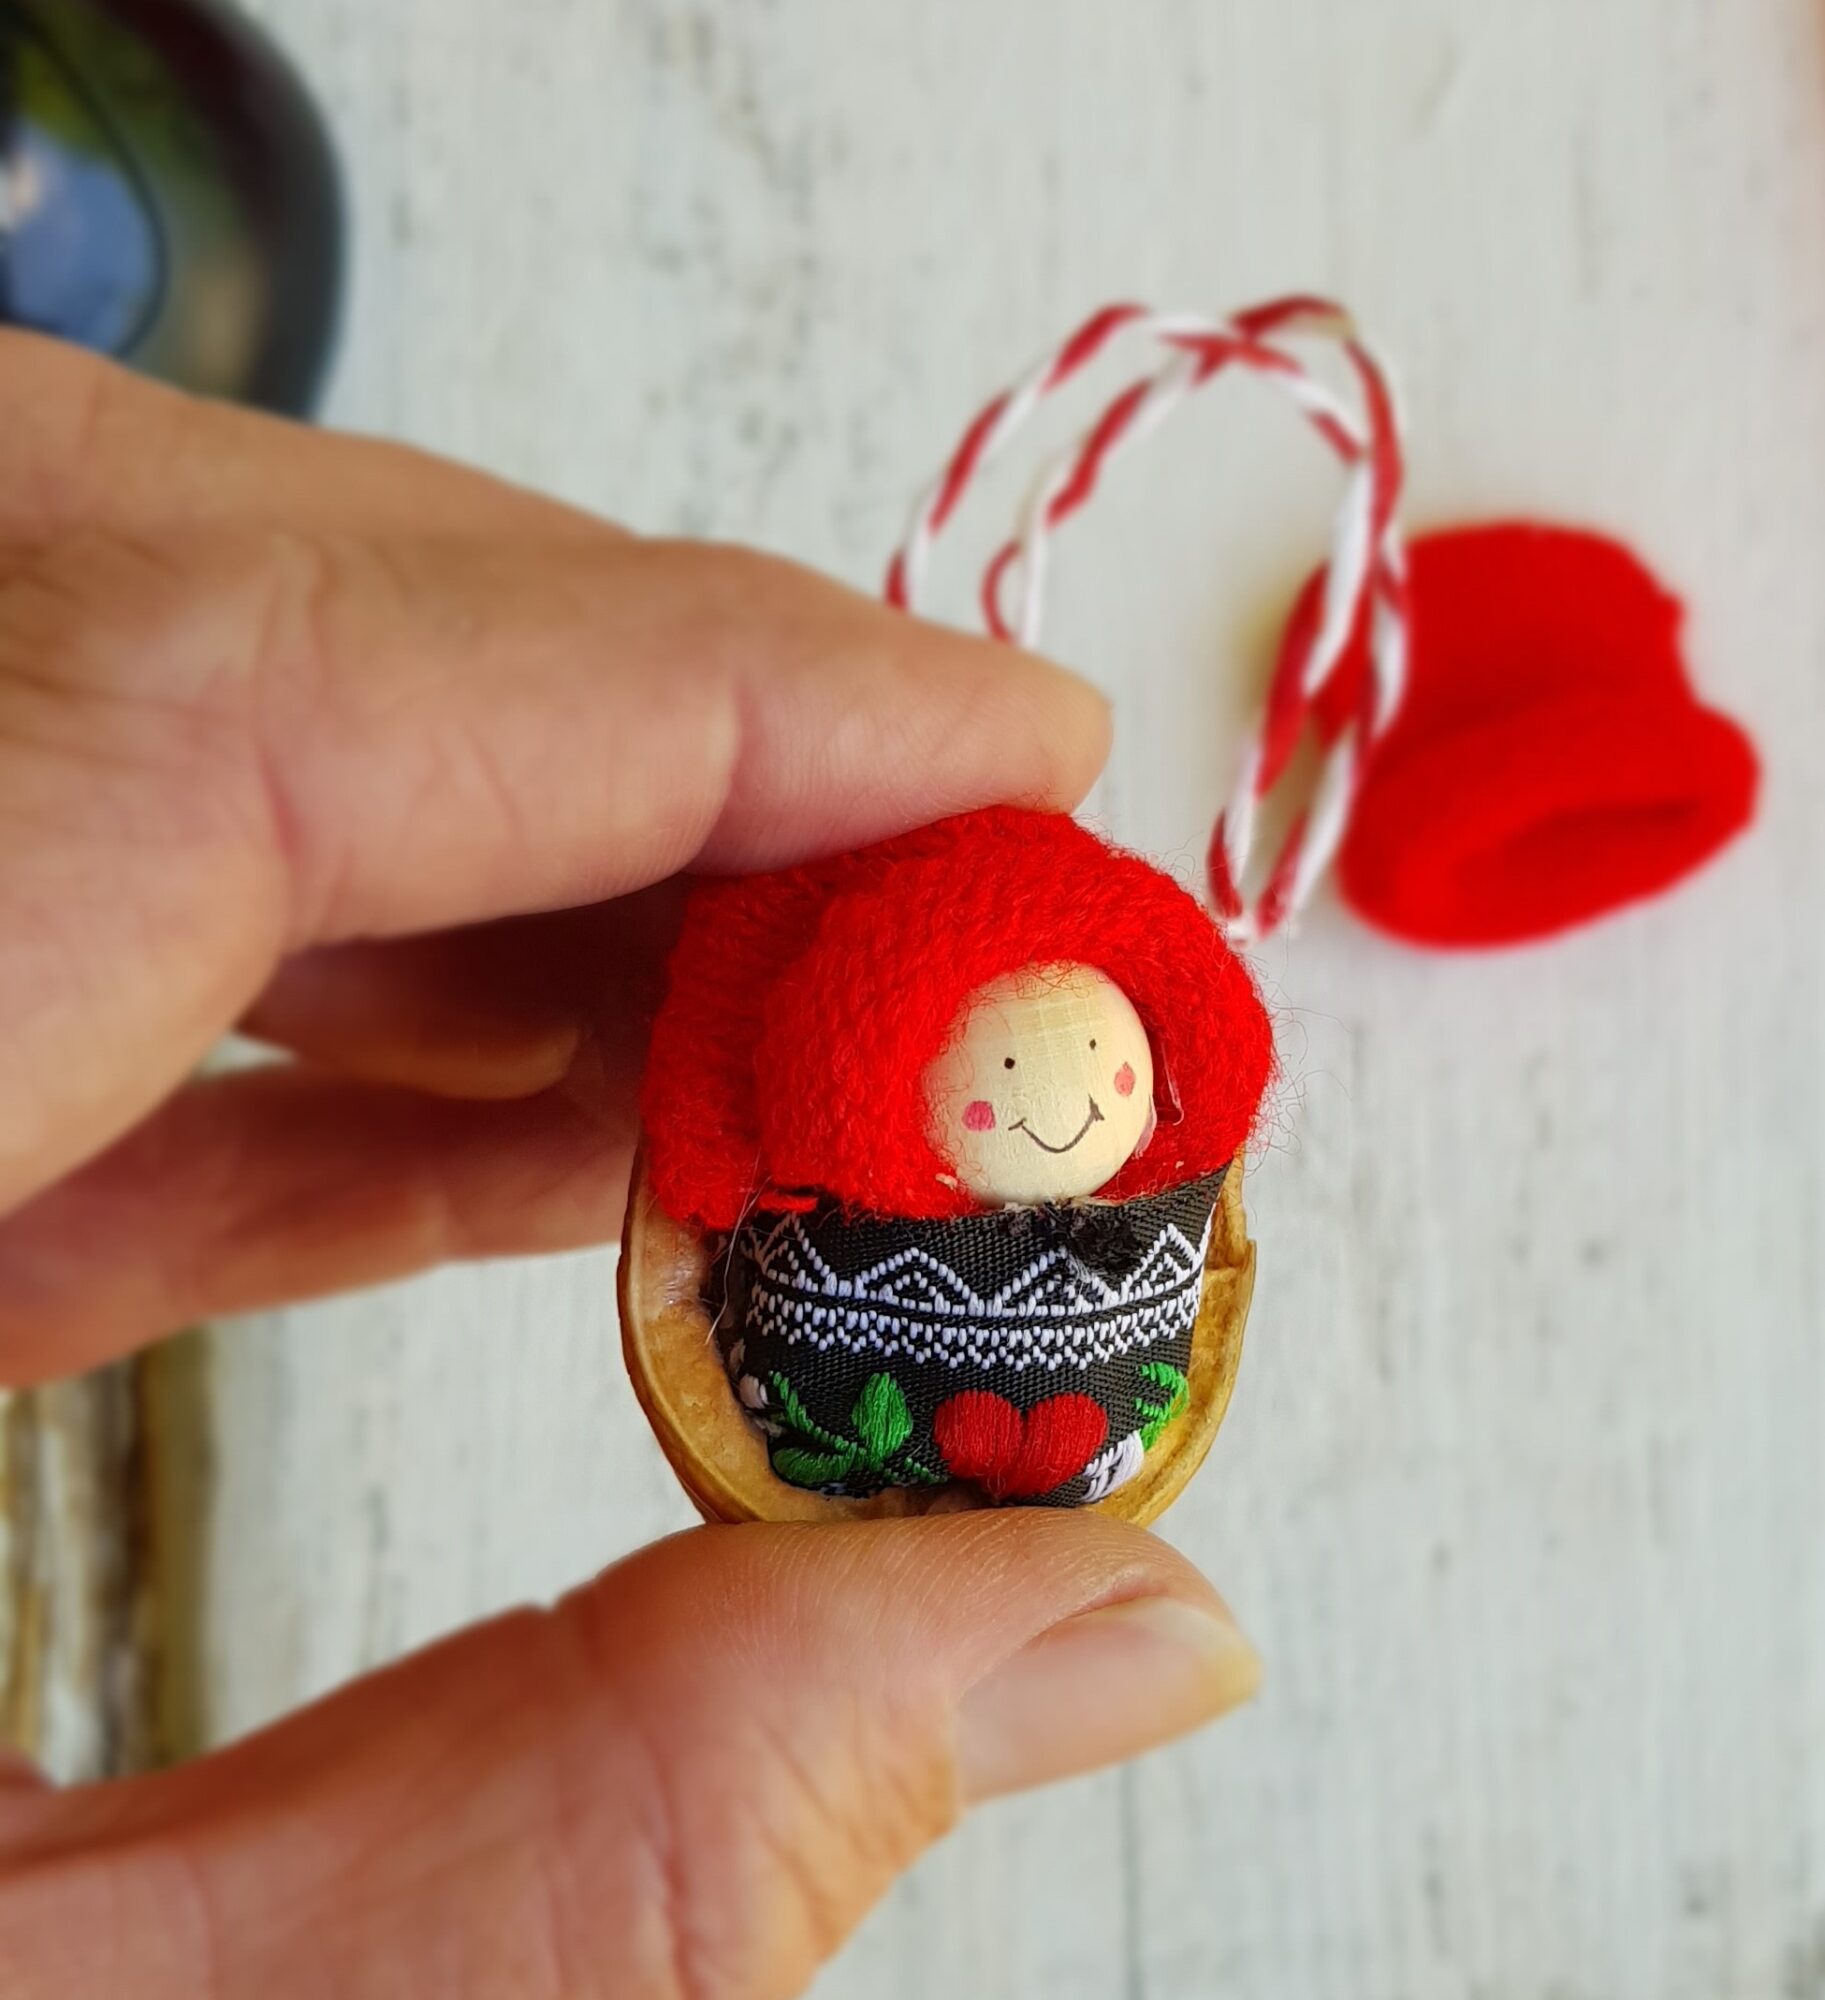
7. Insert the bead just under the brim, adding a blob more adhesive if necessary, and hold it in place until it sets.
8. Glue the whole hat/head combo into the walnut shell, nestling it snugly under the blanket
Craft Your Own Cosy Scandi Christmas by Becci Coombes (£18.99, White Owl)
NorthernLife Nov/Dec 2022